Recent Water Damage Posts
How to Identify and Address Hidden Water Leaks in Your Home or Business
3/12/2025 (Permalink)
 Water leaks can be a silent threat to homes and businesses in San Antonio, TX, often causing significant damage before they are even detected.
Water leaks can be a silent threat to homes and businesses in San Antonio, TX, often causing significant damage before they are even detected. While visible leaks are easy to spot, hidden leaks require a more investigative approach. Identifying and addressing hidden water leaks promptly can save property owners time, money, and stress. Here’s how you can detect and fix hidden leaks like an expert.
Signs of a Hidden Water Leak
Not all water leaks are obvious, but some telltale signs can indicate an issue beneath the surface. If you notice any of the following, it’s time to investigate further:
- Unexplained Increase in Water Bills – A sudden spike in your water bill could be a sign that water is being wasted due to an unseen leak.
- Low Water Pressure—If water flow has decreased without a known cause, a hidden leak may be reducing pressure in the pipes.
- Stains or Discoloration – Brown or yellow spots on walls, ceilings, or floors can signal water accumulation behind surfaces.
- Warped or Buckled Flooring – Moisture from leaks can cause wood floors to warp or laminate flooring to bubble.
- Moldy or Musty Odors—A persistent damp smell, especially in enclosed areas, can be a sign of a hidden leak.
- Peeling or Bubbling Paint and Wallpaper – Moisture trapped behind walls can cause paint and wallpaper to lose adhesion.
- Dripping or Running Water Sounds – If you hear water running when all fixtures are turned off, there might be a hidden leak.
Finding Hidden Water Leaks
Once you suspect a leak, you’ll need to determine its source. Here are some effective methods for locating hidden leaks:
Check Your Water Meter
- Turn off all water fixtures and appliances.
- Check the water meter reading.
- Wait for at least an hour without using any water, then check again.
- If the meter has changed, you likely leak.
Inspect Walls and Ceilings
Look for discoloration, bubbling, or soft spots in drywall, as these can indicate hidden water damage.
Use a Thermal Imaging Camera
Professional leak detection often involves thermal imaging, which can reveal moisture behind walls without invasive inspections.
Conduct a Dye Test
For toilet leaks, add food coloring to the tank and wait 15 minutes. If the color appears in the bowl, the toilet has a silent leak.
Call a Professional
If you can’t locate the leak yourself, a professional water damage restoration team like SERVPRO® has specialized equipment to detect and resolve hidden leaks efficiently.
How to Address Hidden Water Leaks
Once you’ve identified a hidden water leak, it’s essential to take quick action to minimize damage. Follow these steps to effectively handle the situation:
1. Shut Off the Water Supply
If you locate the source of the leak, turn off the main water valve to prevent further water loss and damage.
2. Repair or Replace the Affected Pipe or Fixture
Depending on the severity, you may need to repair a small section of pipe, replace fittings, or call a professional plumber.
3. Dry Out Affected Areas
To prevent structural damage, use fans, dehumidifiers, and proper ventilation to dry out damp areas.
4. Inspect for Structural Damage
Water leaks can weaken wood, drywall, and insulation. A professional assessment can determine if repairs are needed.
5. Restore and Prevent Future Leaks
SERVPRO specializes in water damage restoration, ensuring your home or business is fully repaired. Prevent future leaks by:
- Regularly inspecting plumbing and appliances.
- Sealing any cracks in walls or foundations.
- Monitoring water usage to catch sudden spikes.
- Installing leak detection devices in high-risk areas.
Frequently Asked Questions (FAQs)
Q: How long does it take to detect a hidden water leak?
A: Some leaks can be identified quickly by checking the water meter, while others may require professional tools like moisture detectors or thermal imaging cameras.
Q: Can a hidden water leak cause major damage?
A: Yes, prolonged exposure to water can weaken structures, cause cosmetic damage, and lead to costly repairs.
Q: Should I try to fix a hidden leak myself?
A: While minor leaks can be addressed with DIY fixes, it’s best to consult a professional for more complex issues to ensure proper repairs and prevent recurring problems.
Q: How often should I inspect my home or business for water leaks?
A: It’s recommended to check your property for leaks at least twice a year and after severe weather events.
Q: Can SERVPRO help with hidden water leaks?
A: Absolutely! SERVPRO has the expertise and advanced equipment to detect, repair, and restore damage caused by hidden leaks.
Hidden water leaks can be deceptive, but with the right knowledge and action, you can protect your home or business from costly damages. By staying vigilant and addressing leaks promptly, you can maintain a safe and dry environment. If you suspect a hidden leak, don’t wait—contact SERVPRO for professional water damage restoration and expert solutions.
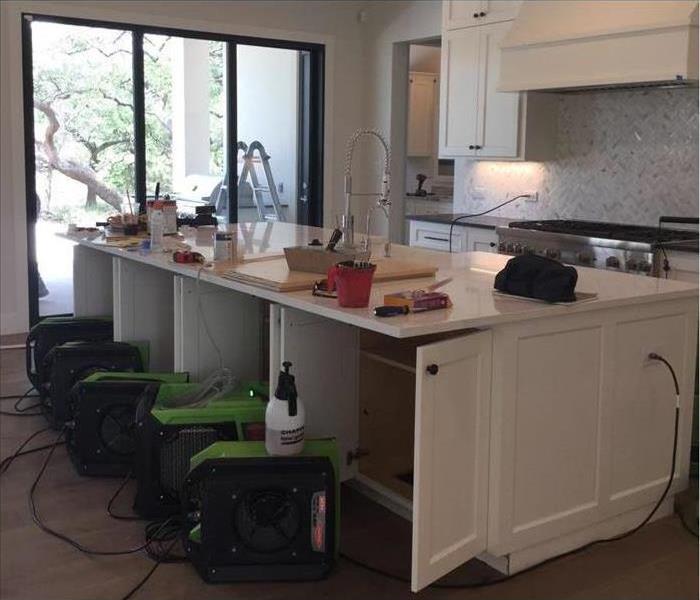
The Science of Dehumidification: Key to Restoring and Maintaining Indoor Air Quality
9/17/2024 (Permalink)
Indoor air quality (IAQ) plays a critical role in the health and comfort of any home or commercial property. Poor air quality, often caused by excess moisture, can lead to mold growth and unpleasant odors. In this blog, we’ll explore the science behind dehumidification and its role in restoring IAQ, as well as how professional services like SERVPRO of Stone Oak can help.
Understanding Humidity and Its Effects on Indoor Air Quality
Humidity refers to the amount of moisture present in the air. While some level of humidity is natural and necessary, excess moisture can cause various problems. For indoor environments, the optimal humidity range is generally between 30% and 50%. When humidity levels exceed this range, several issues can arise, including:
Mold Growth
- Mold thrives in damp environments, and high humidity levels create the perfect conditions for it to grow. Mold spores in the air can exacerbate allergies.
Condensation
- Excess humidity can lead to condensation on windows, walls, and ceilings. Over time, this can damage building materials, lead to peeling paint, and encourage the growth of mold and mildew.
Poor Air Quality
- High humidity can trap airborne particles such as dust, pet dander, and pollen, reducing overall indoor air quality.
Unpleasant Odors
- Moist environments often develop musty or stale odors, especially if mold or mildew is present. These odors can be difficult to eliminate without addressing the underlying moisture problem.
The Science Behind Dehumidification
Dehumidification is the process of removing excess moisture from the air to bring humidity levels back to a comfortable and safe range. It involves the use of dehumidifiers, which work by drawing air into the unit, cooling it to condense the moisture, and then releasing the drier air back into the room. The process can be broken down into the following steps:
Air Intake
- A fan inside the dehumidifier pulls in warm, moist air from the surrounding environment.
Cooling the Air
- The air is passed over cold coils, which cool the air down, causing the moisture to condense into water droplets.
Moisture Collection
- The collected water droplets are either drained away or stored in a reservoir within the dehumidifier, depending on the model.
Releasing Dry Air
- The now dehumidified air is reheated slightly and then released back into the room at a lower humidity level, improving the overall air quality.
The Role of Dehumidification in Restoring Indoor Air Quality
Maintaining proper humidity levels through dehumidification not only improves air quality but also helps preserve the integrity of the building and its contents. Here’s how dehumidification contributes to restoring IAQ:
Reducing Mold and Mildew
- Mold requires moisture to grow, and controlling humidity is one of the most effective ways to prevent its spread. Dehumidifiers reduce the moisture available for mold spores, helping to keep mold growth in check.
Improving Comfort
- High humidity can make a room feel stuffy and uncomfortable, even when the temperature is controlled. Dehumidification helps create a more comfortable living or working environment by maintaining balanced humidity levels.
Preventing Structural Damage
- Excess moisture can damage building materials over time, causing wood to warp, drywall to deteriorate, and paint to peel. By reducing humidity, dehumidifiers help preserve the structural integrity of the building.
When to Use Dehumidifiers: Key Scenarios
While dehumidifiers are useful in maintaining everyday indoor air quality, certain situations may require their use more urgently:
Post-Water Damage
- After a flood, leak, or burst pipe, high humidity levels are common due to excess moisture in the building materials and air. Dehumidification is a crucial step in water damage restoration to prevent secondary damage and ensure the property dries out completely.
Basements and Crawl Spaces
- These areas are naturally prone to high humidity, especially in climates with heavy rainfall or poor drainage. Using dehumidifiers in basements and crawl spaces can prevent moisture buildup and the subsequent growth of mold.
Humid Climates
- In regions with consistently high humidity, such as the southeastern United States, dehumidifiers may be needed year-round to maintain optimal indoor air quality and protect against mold and mildew growth.
New Construction or Renovations
- During construction or renovation projects, moisture can become trapped in building materials like concrete, drywall, and paint. Dehumidification helps accelerate the drying process and prevents long-term moisture issues.
Professional Dehumidification Services with SERVPRO®
While many homeowners and businesses use portable dehumidifiers for routine IAQ maintenance, large-scale moisture problems or post-water damage situations often require professional intervention. SERVPRO offers comprehensive dehumidification services as part of its water damage restoration process. SERVPRO professionals assess the extent of water damage or moisture buildup using advanced tools like moisture meters and thermal imaging. This ensures that hidden moisture is detected and addressed.
SERVPRO uses industrial-grade dehumidifiers capable of removing large volumes of moisture quickly and efficiently. This is essential in commercial properties or large homes that have experienced significant water damage.
In emergency situations like floods or leaks, SERVPRO’s 24/7 emergency response ensures that dehumidification and drying begin promptly, minimizing the risk of mold growth and further damage.
When moisture issues exceed the capacity of household dehumidifiers, professional services like SERVPRO of Stone Oak offers the expertise and equipment needed to restore your property to a safe, dry state.
The Role of Thermal Imaging in Detecting Hidden Water Damage
6/12/2024 (Permalink)
 Trust SERVPRO to leverage the latest innovations in restoration technology, ensuring prompt, professional, and reliable service every step of the way.
As your trusted restoration experts, we at SERVPRO® understand that water damage can often be more than meets the eye. While some signs may be apparent, such as damp spots or discoloration on walls and ceilings, there are instances where water damage lurks beneath the surface, undetectable to the naked eye. This is where thermal imaging proves to be an invaluable tool in our arsenal.
What is Thermal Imaging?
Thermal imaging, also known as infrared thermography, is a technology that allows us to capture images of heat radiation emitted by objects and surfaces. By using specialized cameras, we can visualize temperature variations within a given space, revealing anomalies that may indicate the presence of hidden water damage.
Detecting Hidden Water Damage
Water has a distinct thermal conductivity compared to dry materials like wood or drywall. When moisture is present, it alters the temperature of the affected area, creating thermal patterns that can be identified through thermal imaging. Even if water is concealed behind walls, ceilings, or floors, thermal imaging can detect these subtle temperature variations, enabling us to pinpoint the source of the problem accurately.
Preventing Further Damage
Identifying hidden water damage early is crucial in preventing further structural deterioration and mold growth. By utilizing thermal imaging during our inspection process, we can intervene promptly, mitigating potential risks and minimizing the scope of damage. This proactive approach not only safeguards your property but also helps to avoid costly repairs down the line.
Enhanced Efficiency and Accuracy
Traditional methods of detecting water damage, such as visual inspection or moisture meters, may overlook hidden issues or require invasive techniques like drilling holes for access. Thermal imaging offers a non-invasive, efficient alternative that provides comprehensive insights without causing disruption to your property. By accurately identifying the extent of water damage, we can develop a targeted restoration plan tailored to your specific needs, ensuring swift and effective resolution.
Trusted Expertise, Reliable Solutions
At SERVPRO, we prioritize the use of advanced technologies like thermal imaging to deliver superior results for our clients. Our certified technicians undergo rigorous training to proficiently utilize these tools, combining technical expertise with industry-leading practices to address even the most challenging water damage scenarios.
When it comes to safeguarding your property against the perils of water damage, knowledge is power. By harnessing the capabilities of thermal imaging, we can uncover hidden issues before they escalate, providing peace of mind and preserving the integrity of your home or business. Trust SERVPRO to leverage the latest innovations in restoration technology, ensuring prompt, professional, and reliable service every step of the way. Contact us today to learn more about how thermal imaging can benefit your property.
Immediate Steps To Take After A Water Leak
11/15/2023 (Permalink)
 Dealing with mold due to water intrusion in your San Antonio home requires swift and decisive action.
While our city enjoys a warm and vibrant climate, it also means that water leaks and mold infestations can become unwelcome houseguests. In this blog, our local SERVPRO® team is here to guide you on immediate action steps to take when facing mold due to water intrusion in your San Antonio home.
Understanding the Impact of Water Damage
Water intrusion can occur from various sources such as leaks, flooding, or even high humidity. When left unaddressed, it can create the perfect conditions for mold growth, which can be a challenge to deal with. Prompt action is crucial to prevent further damage and to keep your home mold-free.
Immediate Action Steps
Safety First
Before you start addressing the issue, ensure your safety. Turn off electricity to the affected area if there's any risk of electrical hazards. Use appropriate personal protective equipment, such as gloves and masks, when dealing with mold-affected areas.
1. Stop the Source of Water Intrusion
Identify and stop the source of water intrusion immediately. This could be a leaking pipe, a roof leak, or flooding from heavy rain. If the issue is beyond your control, contact a professional plumber or roofer for assistance.
2. Assess the Damage
Inspect the affected areas for the extent of water damage and mold growth. Pay attention to walls, ceilings, floors, and any visible signs of mold, such as discoloration or musty odors.
If the area is extensive or mold growth is severe, consider contacting SERVPRO® of Stone Oak for professional mold remediation services.
3. Begin Drying and Ventilation
Use fans and dehumidifiers to start the drying process. Proper ventilation is essential to reduce humidity levels and prevent further mold growth. Open windows and doors to encourage airflow, especially in the affected areas.
4. Remove and Isolate Affected Items
If you can safely do so, remove water-damaged and mold-infested items from your home. Isolate them outdoors to prevent the spread of mold spores. Consult with professionals about restoring or replacing damaged items.
5. Clean and Disinfect
Clean and disinfect the affected surfaces using appropriate cleaning products. Scrub mold gently from hard surfaces. Dispose of porous materials like drywall or insulation that cannot be adequately cleaned and dried.
Dealing with mold due to water intrusion in your San Antonio home requires swift and decisive action. By following these immediate steps, you can mitigate further damage and reduce the risk of mold growth. If you encounter extensive or challenging mold issues, don't hesitate to reach out to our local SERVPRO® of Stone Oak team for professional mold remediation services. Stay proactive and keep your home mold-free!
Tips to Avoid Common Pitfalls While Navigating Water Damage Insurance in San Antonio
10/14/2023 (Permalink)
 After water damage occurs, it's crucial to act quickly.
Water damage can be a homeowner's worst nightmare, especially in a city like San Antonio, where heavy rains and flooding are not uncommon. While having insurance is essential to protect your property, understanding your water damage coverage is equally crucial. In this blog, we'll delve into some common pitfalls homeowners in San Antonio should be aware of when it comes to water damage insurance coverage.
Flood Insurance vs. Standard Homeowners Insurance
One of the most significant misconceptions is assuming that standard homeowners insurance automatically covers flood damage. It doesn't. Flood insurance is a separate policy that you must purchase through the National Flood Insurance Program (NFIP) or a private insurer. San Antonio's proximity to rivers and its low-lying areas make flood insurance a wise investment.
Gradual Damage vs. Sudden and Accidental Damage
Insurance policies typically cover sudden and accidental water damage, such as a burst pipe or a sudden roof leak. However, they may not cover gradual damage, which occurs over time due to poor maintenance or neglect. Regular maintenance and prompt repairs can help avoid coverage denials.
Mold and Mildew Coverage
Many standard policies may exclude or limit coverage for mold and mildew damage resulting from water intrusion. It's essential to understand the terms and limitations of your policy, as mold remediation can be expensive.
Documenting Damage
In the event of water damage, documenting the extent of the damage is crucial. Take photos, keep records of expenses related to mitigation and repairs, and promptly report the damage to your insurance company. Failure to do so can lead to complications during the claims process.
Coverage Limits and Deductibles
Know your policy's coverage limits and deductibles. Some policies may have sub-limits for water damage, which means they may only cover a portion of the total cost. Understanding your policy's limits and deductible can help you make informed decisions when filing a claim.
Professional Mitigation
After water damage occurs, it's crucial to act quickly. Hiring a professional water damage mitigation service like SERVPRO® can help minimize damage and increase the likelihood of a successful insurance claim. Most policies cover the cost of mitigation as part of the claim.
Water damage insurance coverage can be complex, and the last thing you want is to be caught off guard by common pitfalls. Take the time to review your policy, consider supplemental flood insurance if needed, and maintain your property to prevent gradual damage. In case of water damage, document everything, and don't hesitate to seek professional assistance. Remember, knowledge is your best defense against the unexpected in San Antonio's often unpredictable weather conditions.
If you find yourself facing water damage in San Antonio, reach out to SERVPRO® for expert assistance and a smooth claims process. We're here to help you through every step of the way.
Water Damage Tips Everyone Should Know
3/7/2023 (Permalink)
When you're faced with a water damage disaster, it can be tempting to panic. But try not to! Instead, take a deep breath, follow these tips, and work with professionals to get your home back in shape as soon as possible.
Take a deep breath.
The first thing you should do when you notice water damage is to take a deep breath. Don't panic! Just because there's water in your home doesn't mean it has to be a disaster. The more calm and collected you are, the easier it will be for everyone involved (including yourself) to deal with the situation.
Turn off the power.
The next water damage tip is to turn off the power.
This is a crucial step that many people forget, and it's easy to see why: turning off the main electrical breaker can be intimidating, especially if you're not familiar with your home's electrical system. But there are several reasons why you should do it anyway:
- Turning off the electricity prevents further damage to your property and keeps you safe from electrocution or fire hazards (which could happen if water has entered into an outlet).
- Turning off the water supply prevents further damage from occurring to your appliances.
Don't use a vacuum to remove the water.
While it may seem like a good idea to use a vacuum to remove standing water, the reality is that this can do more harm than good. Vacs are designed to be used on dry surfaces, and they can cause damage to the electrical system and structure of your home if you try using one on wet carpeting and floors.
Additionally, vacuums have limited suction power--even high-powered ones won't be able to extract every last drop of moisture from your carpet or flooring. This is why it's important not just to get rid of standing water but also to call in professionals who know how best to remove moisture from each type of surface.
Take photos and videos of the water damage.
When you're dealing with water damage, it's easy to forget the details of what happened. Taking photos and videos will help you remember exactly what was damaged and how it should be repaired, which will make the insurance claim process easier for everyone involved.
Take photos of:
- The source of the water (if known)
- Affected areas (wherever there is visible damage)
- Affected items (things that aren't working because of their exposure to moisture)
Call a professional restoration company.
A professional restoration company is the best option for dealing with water damage. The most obvious reason for this is that they have the right tools and training to do the job safely--but there are other reasons as well. A professional restoration company, such as SERVPRO of Stone Oak, will take care of the entire insurance claims process for you. From start to finish, they will work with your insurance company to ensure that you receive the proper compensation. And finally, because of their experience with water damage (and other disasters), they'll know what steps need to be taken in order to minimize further damage after removing excess moisture from your home or office space.
Don't panic, follow these tips instead!
Water damage can be scary, but it's important not to panic and follow these tips instead!
- Take a deep breath. We know that sounds silly, but taking a moment to calm down will help you focus on what needs to be done next.
- Turn off the power to prevent the chance of electrical shock or electrocution
- Don't use a vacuum cleaner to remove any water.
- Call a restoration company.
- Take pictures of the damage.
We hope that this post has given you some helpful tips for dealing with water damage. While it may be scary, it's important not to panic and follow these tips instead!
How To Deal with Water Damage in My Attic
1/20/2023 (Permalink)
Water damage in the attic can be a hidden problem. With proper home maintenance and regular inspections, you can spot water damage early and prevent further problems from occurring.
Leak in Roof
If you suspect your roof is leaking and you want to test it, you can use a spray bottle filled with water. Spray the area where you suspect a leak. If it’s dry when you come back, then there isn’t an issue there.
If it’s still wet after several hours or overnight, then that means there is moisture in the area and it may be time to remove some shingles or tiles and find out the source of the leak.
Once you have found the cause of your leaky roof problem, fix it right away! The longer this goes on for without being corrected, the more damage will be caused inside your home by standing water inside your walls or ceiling areas (this includes woodwork). If left too long without repair work done on them immediately after finding out what caused these leaks through inspection processes. Structural damages such as rot from water damage can cause a lot of money to repair. If you suspect your roof is leaking, give the professionals at SERVPRO of Stone Oak a call today!
Hidden Water Damage
Hidden water damage can be caused by a variety of sources and is often unnoticed by homeowners. For example, roof leaks are often not visible to the naked eye until they have caused enough damage to be noticeable. A leak in your plumbing system or HVAC system may only be detectable after significant damage has been done to ceilings and walls. If you suspect that your attic might contain hidden water damage, it’s important to inspect it thoroughly in order to confirm or refute this possibility.
Roof Damage Causes
Water damage in your attic can be caused by a number of things, including roof leaks and roof damage. Roof repairs are necessary to prevent water damage in your attic if water damage has been present. A damaged roof can cause problems such as cracking, crumbling, or becoming loose. Roof replacement is another option for keeping the water out of your home. Some roofing materials include asphalt shingles (cobalt blue), clay tiles (beige), slate shingles (dark green), metal roofs (silver) and wood shakes/shingles (light brown). Roofing contractors offer services such as installation and repair work on residential homes' roofs including: re-roofing services, maintenance services, emergency response calls, gutter cleaning & repair services.
Roof Inspection
A thorough inspection of your roof is a good first step, as there could be issues with the shingles or flashing that need attention. If you have an attic, check for water damage in the attic space and make sure its venting is sufficient.
First, determine if you have any leaks or water penetrations by checking all gutters, downspouts and roof vents. If any leaky areas are found on your roof surface, they should be repaired immediately to avoid further damage to both the roofing structure and interior spaces below it.
While attic water damage may seem like a daunting problem, the good news is that it's not hard to fix. The key is to recognize the problem as soon as possible and get started with repairs right away. If you're dealing with water damage in your attic, then give SERVPRO of Stone Oak a call today!
Plan for Mitigating Water Damage
11/9/2022 (Permalink)
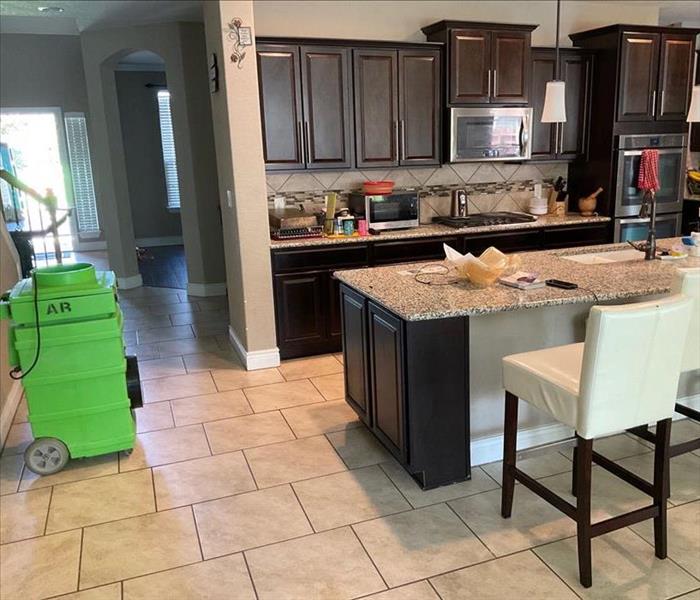
 Residential water clean up
How to Clean Up Water Damage After a Water Leak
Water damage is one of the most expensive and time-consuming disasters you can experience. It's also one of the easiest to prevent: a little maintenance goes a long way toward keeping your home safe from water damage. This guide will walk through what you need to do in order to clean up after a water leak so that you can get back to normal life as soon as possible.
1. DOCUMENT AND MOVE
First, document the damage. Take photos of everything that was wet or damaged in any way. Also, if you can, take pictures of where the water came from and how it got there.
Next, move items to higher ground—or at least away from their current location on the floor—as quickly as possible. This will help prevent further damage and allow you to dry out your home more quickly later. Don't forget to move any valuables (like jewelry) out of harm's way too! After this initial step has been taken, remove all items that do need to be replaced due to water damage into a dry area (like another room), so they're not left sitting in puddles while they're drying out.
2. EXTRACT THE WATER
Once you've assessed the damage, it's time to start removing the water. There are several different ways to remove water from your property, it really just depends on the type of water and loss and the extent of the damage.
Once you've removed all of the standing water, use your nose and eyes as indicators for whether or not there are still places where water has pooled. Remember: If a light bulb goes out in an area where there isn't supposed to be any power running, that could mean there's still moisture somewhere!
3. CLEAN AND DISINFECT
Now that the area is dry, you can move on to disinfecting it. This will help to prevent mold and mildew growth, as well as other bacteria. It's important to note that not all disinfectants are safe for every surface—some can damage certain materials. So before buying a disinfectant, make sure you read the product label carefully so you know how much of the product to use and whether or not it will harm your floors or walls.
Another thing to keep in mind is that some disinfectants take longer than others to dry after application; most will dry within 24 hours but it's still best if you avoid walking on them until then.
4. SET UP DRYING EQUIPMENT
Use fans to circulate air. These will help speed up the drying process, especially in areas with high humidity. Set up dehumidifiers in your basement or garage to get rid of excess moisture and reduce odor. Place them on a timer so they turn off after they've sucked as much water out of the air as possible.
If you have a furnace fan, turn it on—it can pull in warm dry air from outside and push out old, damp air that's contributing to mold growth indoors.
5. INSPECT, REPAIR, AND REPLACE
You've got your water damage cleaned up. Now what?
It's time to inspect, repair, and replace items that have been damaged by the water. There are a few things you can do to help keep yourself on track when it comes to repairing things in your home:
- Make a list of damaged items.
- Keep it in one place so everyone knows what needs fixing and where they should look (remembering which rooms were affected by the leak).
- Take pictures of everything as well! You'll want to remember how bad it was before starting any repairs or replacements."
Takeaway:
With a little bit of time and effort, you can clean up your water damage. If the extent of the damage is serious, it is wise to call your local SERVPRO experts for assistance.
Hopefully, this article has helped you understand more about how to clean up water damage after a water leak. If you have any questions or comments, please leave them in the comment section below!
Performing a Successful Water Heater Flush
8/10/2022 (Permalink)
Steps To Perform A Flush For A Water Heater
Performing a successful water heater flush is an excellent way to help maintain your device and prevent unnecessary damage or repairs. The process is very simple, even if you don't have any prior plumbing experience. Follow the steps below to perform a flush for the water heater in your home in San Antonio, TX.
1. Turn Off the Heater's Power.
This process varies depending on whether you have a gas or electric models. For a gas model, simply extinguish the pilot light. If you have an electric model, turn off the line in the circuit box that supplies the heater.
2. Designate a Proper Drainage Area and Connect the Hose.
You need to designate an area where you can drain the water. It should be a spot that can handle lots of warm water flow, without running the risk of flooding your property. Connect one end of your garden hose to the drain valve before running the opposite end of the hose into your designated drainage area.
3. Drain Your Tank.
Open your drain valve to let the water out. Allow it to flow for several minutes. During this time, head into your kitchen and turn on the hot water faucet in the sink. This helps the water run more smoothly. After a few minutes, shut off the supply valve. The water flow will gradually begin to slow before it stops altogether. Reopen the drain valve to perform one more quick flush before shutting it off again.
4. Refill the Tank.
Close the valves and turn the water supply back on. Keep an eye on the faucet in your kitchen. Once the water starts running smoothly, you'll know that the heater's tank is full.
5. Reactivate the Heating Element.
Refer to step one to reactivate the power in your heater. You have now performed a successful water heater flush.
Proper water heater maintenance is essential if you wish to keep your device running properly for a long time. For more assistance or information, contact water remediation experts.
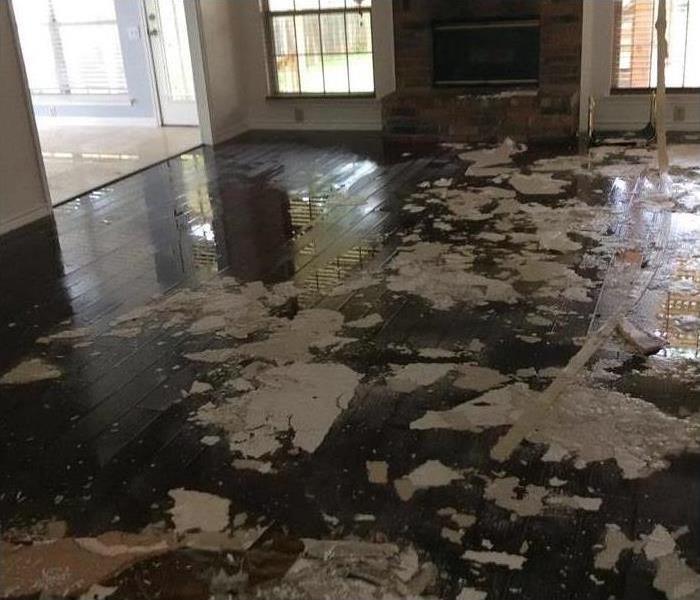
How To Clean Up Wood Floors Quickly After a Water Leak
6/21/2022 (Permalink)
How to Quickly Clean Wood Floors After a Water Leak
You chose wood flooring for your business to create a warm and inviting atmosphere. When you experience water leakage or a flood, it’s important to clean up quickly to avoid damage. Here are three recommendations to achieve the best results when the unfortunate occurs.
1. Stop the Flow of Water from a Pipe Burst or Other Source
The first step in dealing with water on your floors is locating the source and controlling it. Some common problem areas to look for in commercial business settings include:
- Leaking roof
- Faulty sprinkler system
- Clogged gutters
- Old or malfunctioning HVAC system
- Pipe burst
2. Clean Up Right Away
It is essential to begin cleaning up immediately upon managing the water flow to reduce or eliminate the potential for damage. Start by opening windows and doors to improve airflow. Depending on the amount of liquid present, the next step will be to wipe the area with towels or a mop. You can also use a rubber broom to push standing water through an open doorway to facilitate removal. Finally, place commercial fans throughout the space to begin the drying process.
3. Contact the Experts
As you’re assessing the wet floor, you may conclude that you need help. Working with a certified water restoration company will give you peace of mind knowing licensed professionals can help you clean and reopen your business safely. These teams have extensive training to get to the heart of the problem, mitigate further issues and prevent the need to replace your wood floor.
Handling a pipe burst or water damage in San Antonio, TX, is frustrating. Stop the flow, clean wet areas and call in the experts so you can get back to business as usual. By taking proactive steps to effectively deal with unwanted water at your building, you will help to lessen the possibility of damage.
4 Steps To Take After a Pipe Break
5/23/2022 (Permalink)
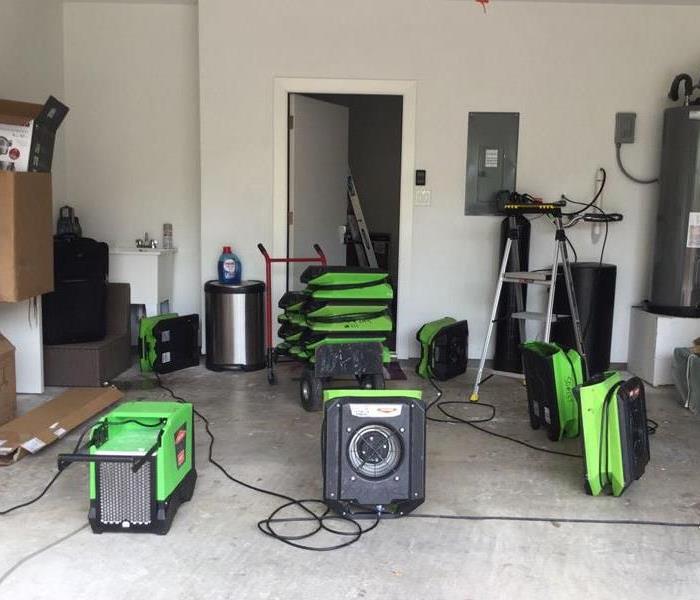
 Water damage in a home in Timberwood Park, TX.
Following These 4 Steps After a Pipe Break
If your Timberwood Park, TX, home has ever been a victim of bursting pipes, you likely know that time is of the essence whenever the possibility of lasting damage is involved. Here are four things to do immediately after a pipe break.
1. Turn Off the Water
Your best bet for minimizing damage after a pipe breaks is to turn off your home's water. The main shut-off is typically found near your water heater or in your basement. If your pipe broke because it froze, open all the faucets in your home, too. This lets any water inside the drain, preventing another round of frozen pipes.
2. Call Professionals Who Know How To Handle Bursting Pipes
Your second step should be to call a water damage mitigation company. Even if you're confident that you know how to fix broken pipe connections or repair a leaky vent pipe, the risk for secondary damage such as mold makes this type of cleanup a job best left to experts. They have the professional-grade equipment and safety gear required to do a thorough job.
3. Begin Removing Water
Next, start mopping up the water. If you have a wet/dry vacuum or even an impressive towel collection, it's time to put it to work.
The exception to this — and it's a very important one — is if electricity is involved. If electronics and other electrical equipment have been soaked, avoid them completely. Similarly, if the electrical outlets are underwater in the affected area, do not enter that room at all.
4. Start Ventilating the Space
Once you've removed as much water as you can, help airflow through the affected space. Ideally, this would involve opening windows wide. If that's impossible, make sure your home's fan is running constantly and/or turn on any ceiling or portable fans.
Bursting pipes are never a welcome surprise. Follow these four steps in the aftermath, and you can minimize damage and expedite the cleanup process.
One Misstep in Your Vacation Planning May Result in Costly Damage
1/23/2022 (Permalink)
When you plan a vacation, you stress over every little detail. You plan your flights so that you have enough time between connections to account for delays and terminal transfers. You pack one or two cold-weather outfits even though you're going to the tropics, just in case. You fill your toiletries bag with vials of medicine, even though neither you nor any of your family members get sick very often. You're more than ready for a week out of the cold, or are you? If you haven't thought about the possibility of a broken pipe and preventing the need for a water pipe repair, you are not prepared.
7 Steps To Preventing Costly Damage
Frozen pipes often lead to extensive and costly water damage throughout the whole home. If an exterior pipe freezes, it can cause a backup in all your pipes. As the pressure builds up, it will look for a way to escape. Typically, escape involves finding weak spots in your pipes and bursting them. You can prevent this process from happening by doing the following:
1. Inspect all your pipes and water appliances for leaks, cracks or fissures. If you discover a weak spot, perform a water pipe repair with caulk or plumbers' tape.
2. Check all the hoses on your washing machine, dishwasher, refrigerator and other appliances. Unkink any kinks.
3. Clear your gutters of debris.
4. Examine your sump pump to ensure that it is in good working order. If you have the means, invest in a backup just in case your basement does become flooded while you're gone.
5. Insulate exposed pipes and shut off the water supply to pipes that lead outdoors and that you're not currently using. Be sure to drain them as well.
6. Have a friend, family member or neighbor come over to check on your home while you're gone.
7. If no one can check on your home, turn off the water at the main. Drain the pipes and leave cupboards under the sink open to allow heat in.
When Your Pipes Do Burst
If your pipes burst regardless of your efforts, contact a Stone Oak, TX, water restoration team. You may also need to call in a plumber to perform an extensive water pipe repair.


 24/7 Emergency Service